01vuepress的使用
# 1.简介
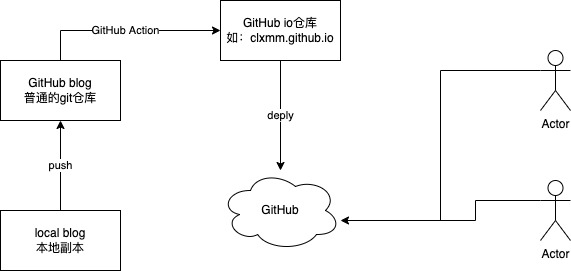
本文主要介绍使用vuepress,搭建自己的博客,并上传到github 上,使用 GitHub Action做为构建工具。做为静态页面的托管。
使用,vuepress-theme-vdoing (opens new window) 做为主题。以 快速上手 (opens new window)为基础框架。在此基础上进行修改搭建。
# 2.基本使用
在GitHub上创建自己的仓库。
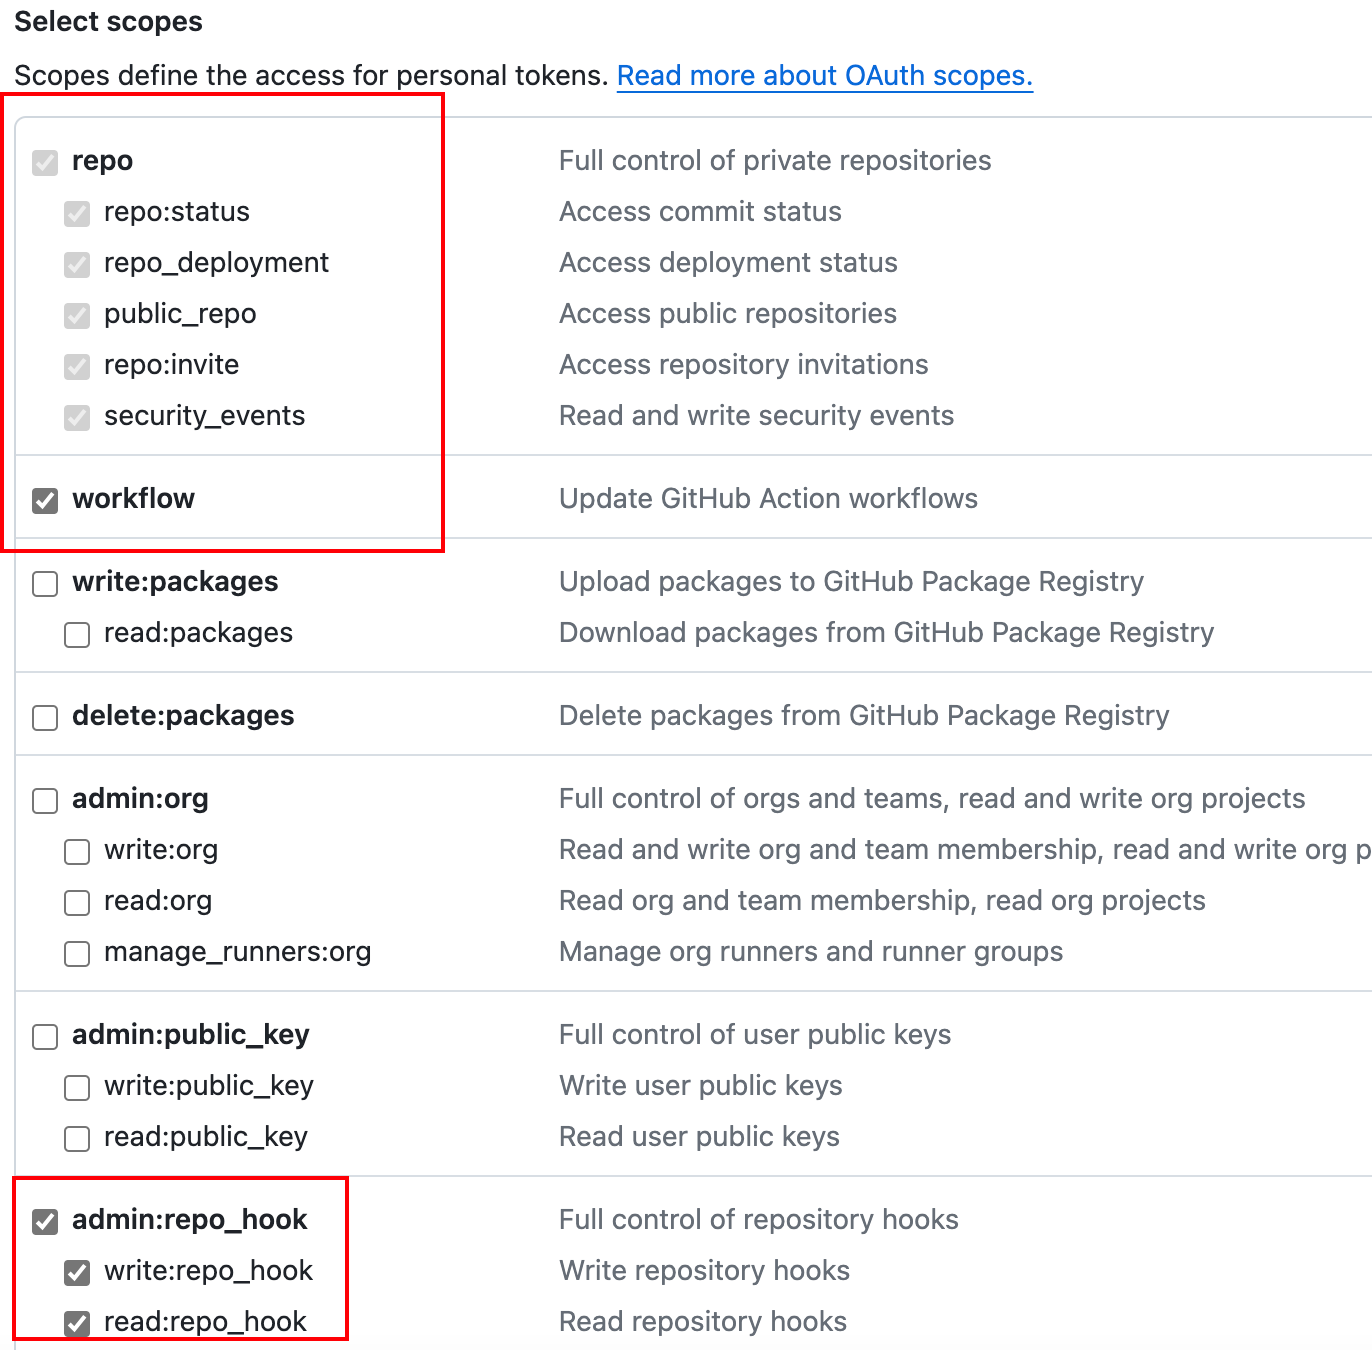
获取GitHub的token。
# 2.1 安装
# clone the project
git clone https://github.com/xugaoyi/vuepress-theme-vdoing.git

# enter the project directory
cd vuepress-theme-vdoing

# install dependency 注意:如安装不成功请关闭淘宝源。
npm install # or yarn install

# develop
npm run dev # or yarn dev
1
2
3
4
5
6
7
8
9
10
11
12
2
3
4
5
6
7
8
9
10
11
12
与自己的github远程仓库关联,上传到远程仓库
# 2.2 GitHub Action的使用。
- 准备github token。选择相应的权限。
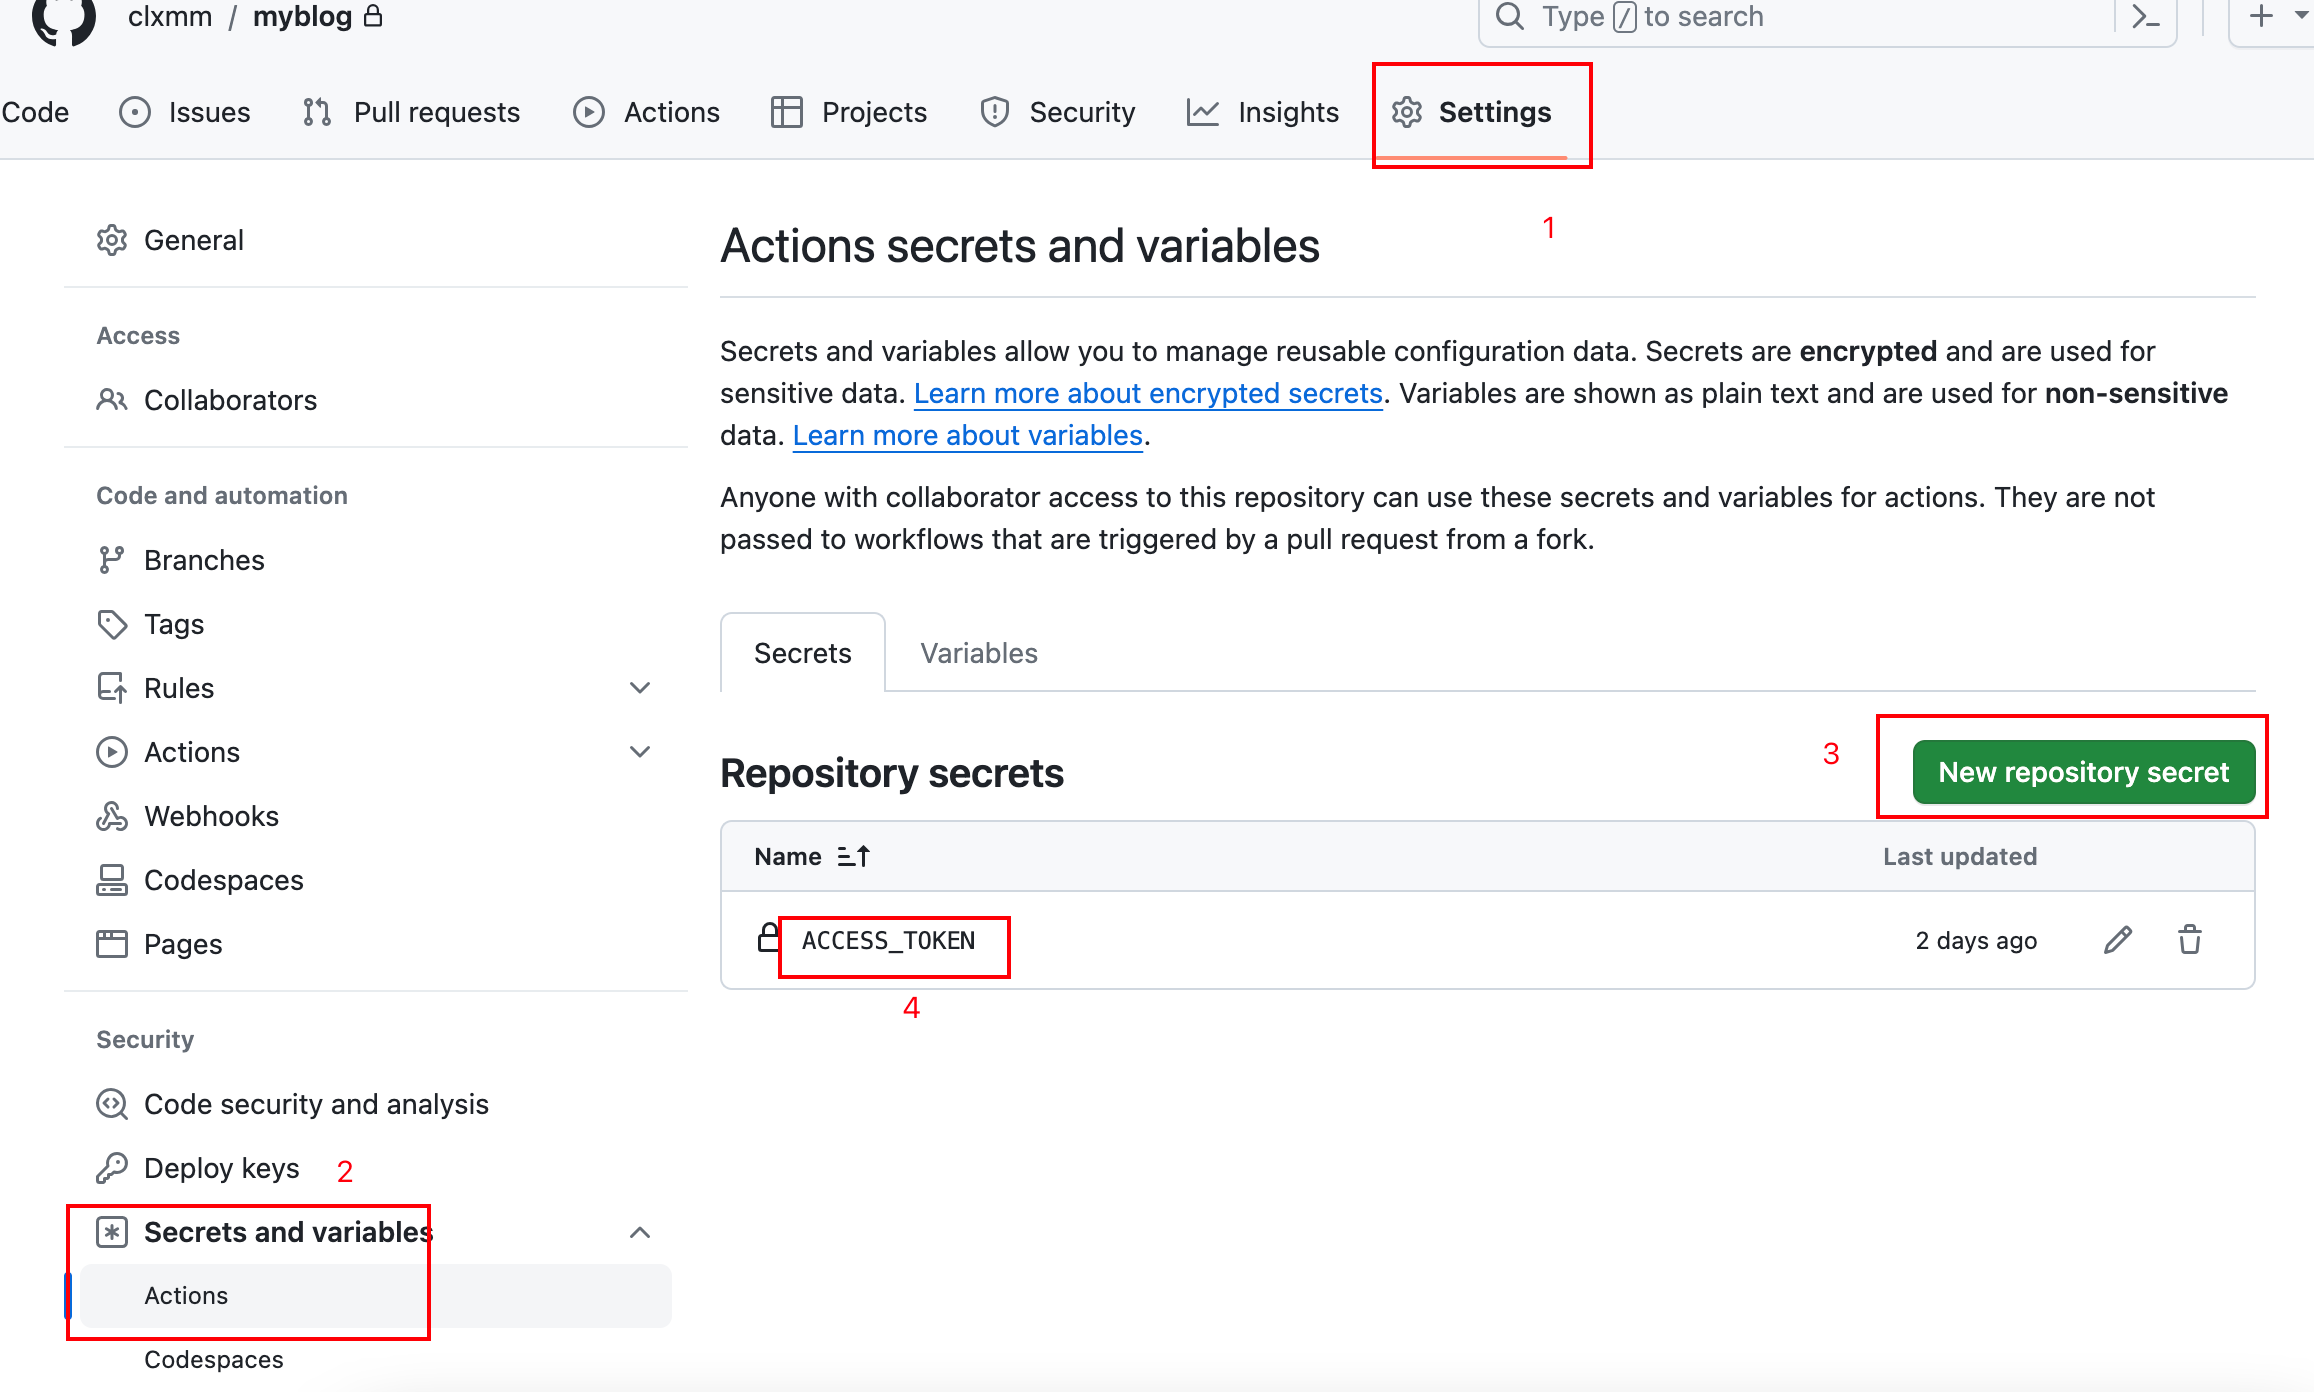
将token添加到远程仓库的配置。
创建git 仓库 。命名
username.github.iousername:自己的github用户名称
# 2.3 修改脚本文件
- 修改源码中的脚本文件
.github/workflows.ci.yml
name: CI

# 在master分支发生push事件时触发。
on:
  push:
    branches:
      - main

env: # 设置环境变量
  TZ: Asia/Shanghai # 时区(设置时区可使页面中的`最近更新时间`使用该时区时间)

jobs: # 工作流
  build:
    runs-on: ubuntu-latest #运行在虚拟机环境ubuntu-latest

    strategy:
      matrix:
        node-version: [20.x]

    steps:
      - name: Checkout # 步骤1
        uses: actions/checkout@v1 # 使用的动作。格式:userName/repoName。作用:检出仓库,获取源码。 官方actions库:https://github.com/actions
      - name: Use Node.js ${{ matrix.node-version }} # 步骤2
        uses: actions/setup-node@v1 # 作用:安装nodejs
        with:
          node-version: ${{ matrix.node-version }} # 版本
      - name: run deploy.sh # 步骤3 (同时部署到github和coding)
        env: # 设置环境变量
          GITHUB_TOKEN: ${{ secrets.ACCESS_TOKEN }} # toKen私密变量
        run: npm install && npm run deploy # 执行的命令
        # package.json 中添加 "deploy": "bash deploy.sh"
1
2
3
4
5
6
7
8
9
10
11
12
13
14
15
16
17
18
19
20
21
22
23
24
25
26
27
28
29
30
31
32
2
3
4
5
6
7
8
9
10
11
12
13
14
15
16
17
18
19
20
21
22
23
24
25
26
27
28
29
30
31
32
根据自己的需求,修改github action的脚本文件
- 脚本文件修改。
deploy.sh
#!/usr/bin/env sh
# 确保脚本抛出遇到的错误
set -e
npm run build # 生成静态文件
ls

# deploy to github
echo 'clxmm.github.io' > CNAME
if [ -z "$GITHUB_TOKEN" ]; then
  msg='deploy'
#   githubUrl=git@github.com:xugaoyi/blog.git
else
  msg='来自github action的自动部署'
  githubUrl=https://clxmm:${GITHUB_TOKEN}@github.com/clxmm/clxmm.github.io.git
  # githubUrl=https://github.com/clxmm/clxmm.github.io.git
  git config --global user.name "clxmm"
  git config --global user.email "meng_yme@163.com"
fi
echo $githubUrl
git clone $githubUrl
pwd
ls
\cp -rf docs/.vuepress/dist/* clxmm.github.io/
cd clxmm.github.io/
pwd

git add .
git status
# cd docs/.vuepress/dist # 进入生成的文件夹
# git init
git commit -m "${msg}"
git status
git push -f $githubUrl master # 推送到github
1
2
3
4
5
6
7
8
9
10
11
12
13
14
15
16
17
18
19
20
21
22
23
24
25
26
27
28
29
30
31
32
33
2
3
4
5
6
7
8
9
10
11
12
13
14
15
16
17
18
19
20
21
22
23
24
25
26
27
28
29
30
31
32
33
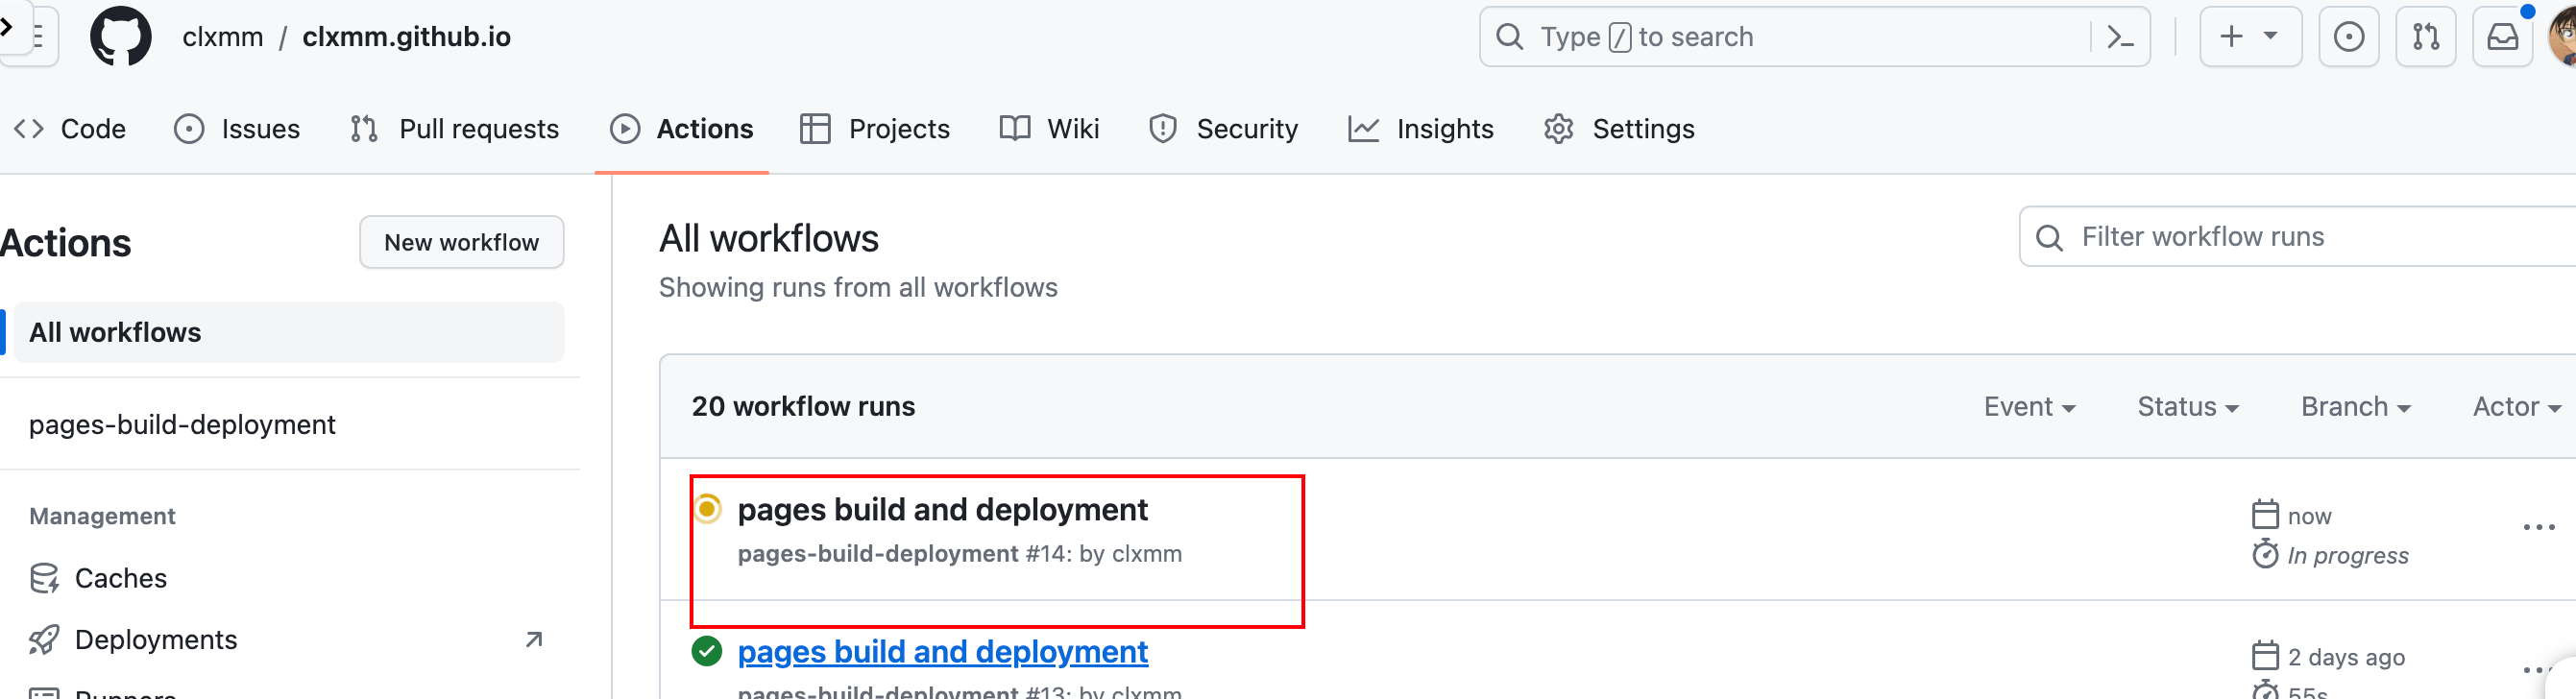
推送到远程仓库,就可以出发GitHub Action。如果是第一次上传,先把ci.yml文件上传之后,才推送一次远程,已实现触发。
# 3.效果
上传远程

触发构建

部署到github io 仓库

实现访问
编辑 (opens new window)
上次更新: 2024/02/09, 18:22:26